STILL LEARNING

These last two weeks have been spent trying to update my Photoshop skills (though it’s questionable if I can really call what I have “skills”). I’ve used Ps Elements for quite awhile and have always just done the basics that my daughter was patient enough to teach me years ago. Basically, after I do an art piece I’ll use the computer to scan it, crop, maybe alter it digitally, things like that. Or make cards and send them off to be printed online. And I have lots of photographs in files that I will print or use in collage work.

It seems, though, that my Ps Elements was kind of dated and Ps Creative Cloud is the new way to go. I read a bit about it, heard about Adobe Bridge, read about camera raw, smart objects…sort of understood it all, so decided to take a trial spin. I thought if I applied myself I could learn some of the essentials, and it shouldn’t be that different from what I have with Elements. I just had to remember to be patient. I’m a visual learner; I never read the manuals, I need to be shown how things operate. I had to update to OS X Yosemite for the Mac in order to download the new version of Ps. I had been trying to avoid that after reading some negative comments, but I did it anyway. I’ve noticed a few differences, but it shouldn’t take long to get used to them. So, after downloading the Creative Cloud version of Ps and Adobe Bridge, I took a look. A lot of new things there, but okay. I decided to follow some step-by-step tutorials on www.puglypixel.com which are very good. I was encouraged, things didn’t seem so bad. My one concern was trying to remember everything, so I started taking notes. Well, as I look at my pages two weeks later, I’m hard-pressed to understand a lot of what I wrote down.

Another good website for help with Photoshop CC is www.lynda.com. You have to subscribe and right now I’m doing the trial, but it looks very worthwhile to get a subscription to unlimited tutorials. They cover more topics than Photoshop, too.  And, of course, the Adobe Help Page had lots of pointers and good info.

I do cheat once in awhile and go back to Ps Elements to get some things done for the sake of speed.  When I try to do something on my own without following a tutorial it can get frustrating, but I am learning. (If things get too maddening, I’ll just take a walk around the block to get away from it for awhile).  I have to remember it’s a learning experience.

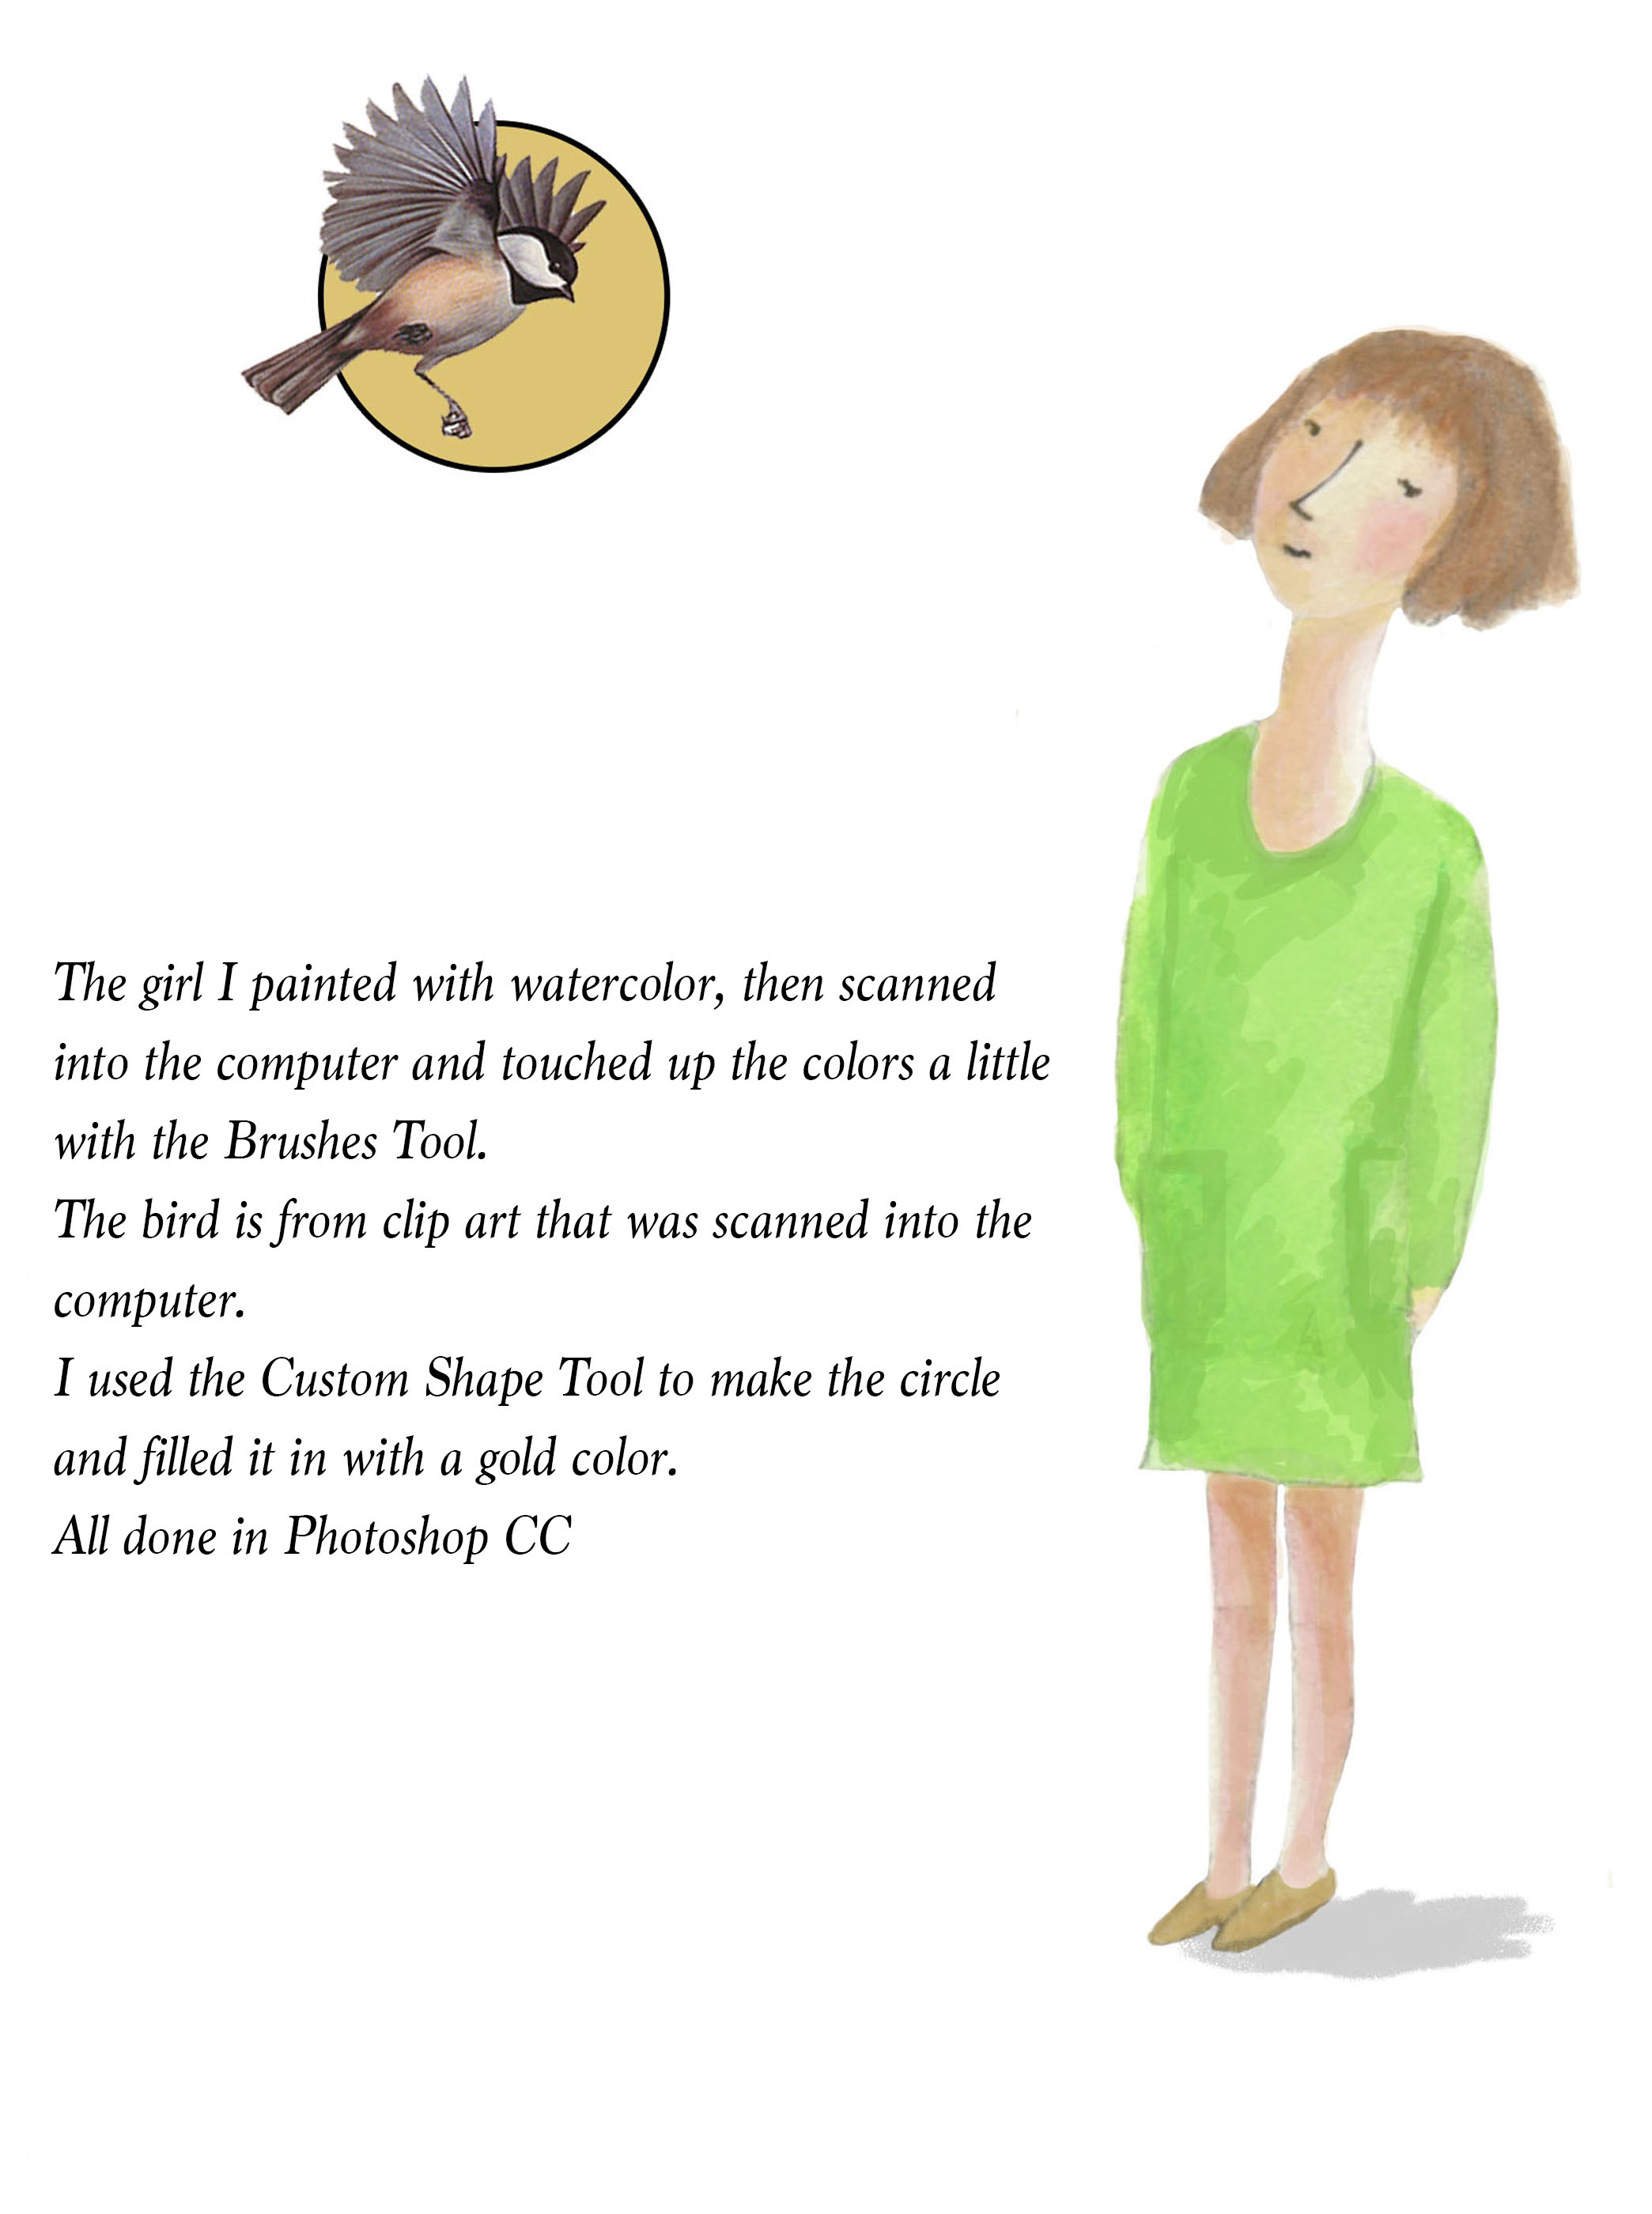
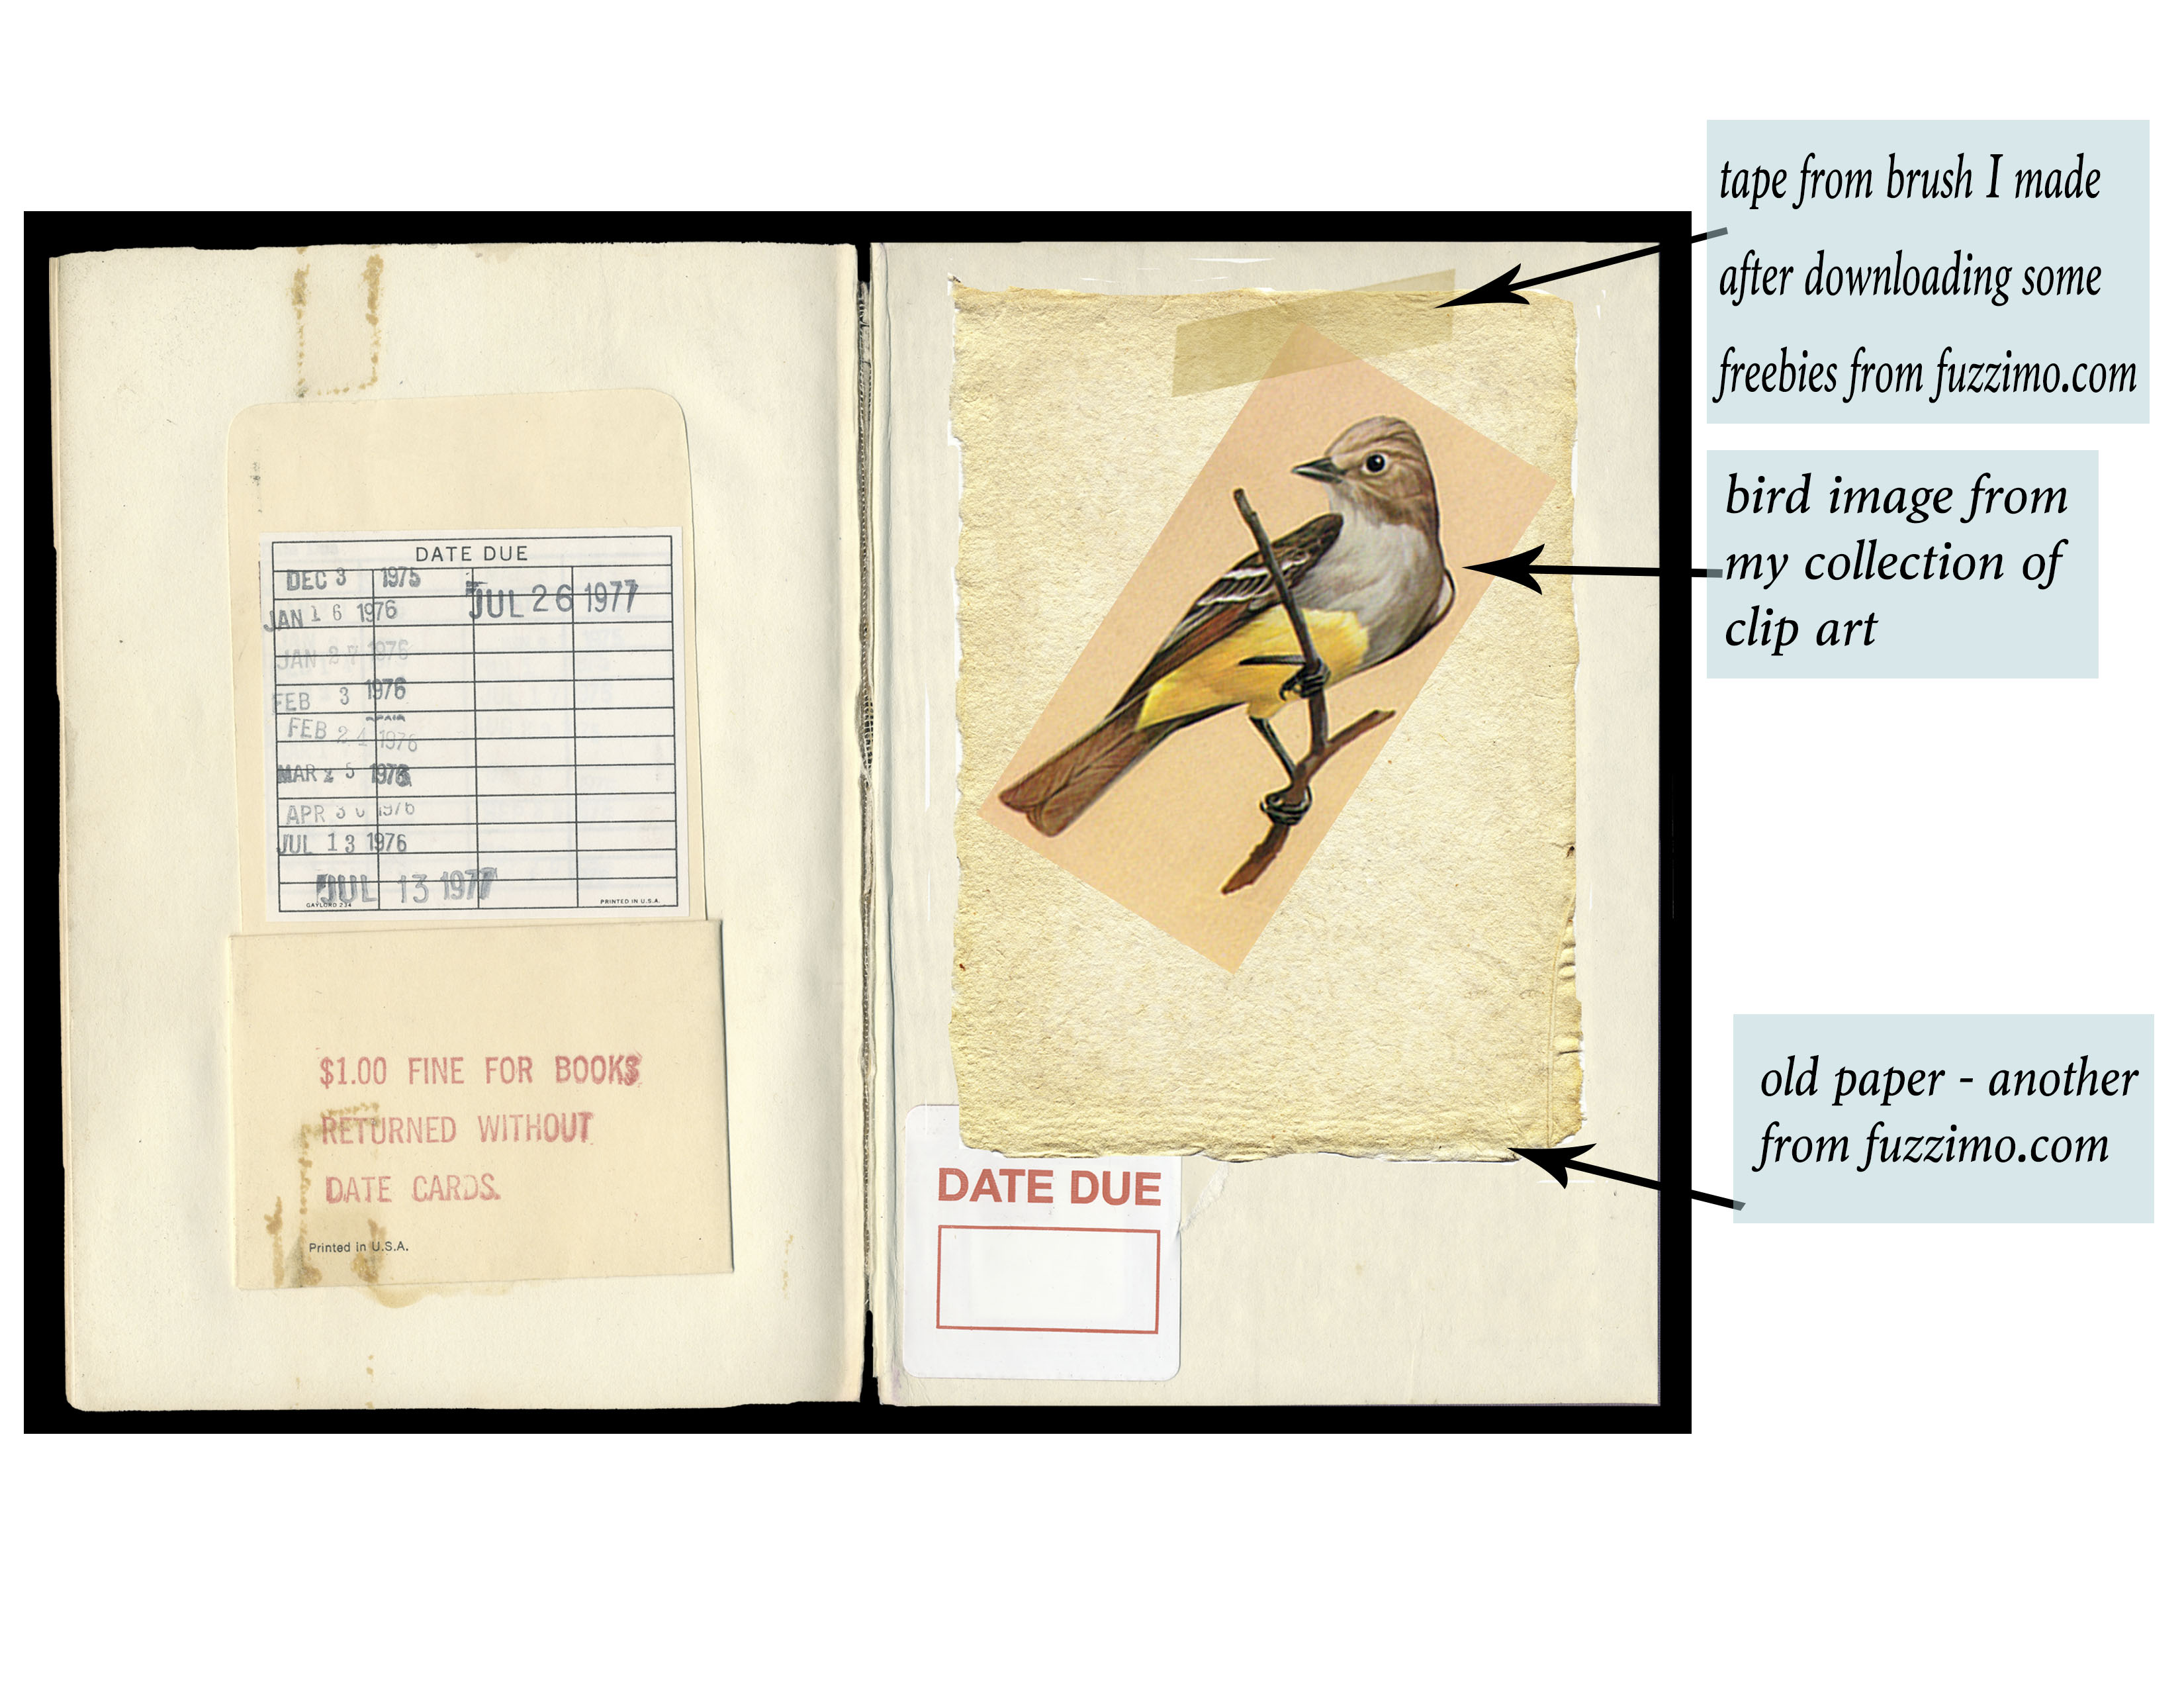
Here are two examples of what I’ve been playing around with.

GirlBirdBookBird

MAKING YOUR OWN BOOKS

I’ve been working on making some small books this past week and thought I’d show how I made one from an ice cream box.  The orange book will be a sketchbook for me and I gave the turquoise one to my daughter for a travel journal.  I want to give credit to Sea Lemon who has some great DIY tutorials on You Tube.  Check her out!

3books              So here’s what you’ll need:

sheets of paper    ice cream box    ruler    pencil    bone folder    clamps    Exacto knife    PVA glue (or Elmers)    hot glue gun

MochiSupplies2

Carefully take the box apart at the seam.  In my case, the seam was on the left, so I opened it, trimmed it down a bit, then re-glued it.  Trim off the flaps on the box so you’re left with something that looks like the cover of a book.

MochiSpineCU  Notice the width of the book spine. That will determine the number of sheets of paper needed to fill the book. Measure and cut your paper to the same height and width of the closed ice cream box/book.  When all pages are cut to size, tamp them down along a long side to even the sheets, then clamp them together on the short sides.  These pages make up the text block, ready to be glued.   MochiText        MochiGlue2  Brush a coat of glue along the long edge of the text block.  Keep the clamps on and let the glue dry.  Repeat the application of glue 2-3 more times, letting each coat dry before adding the next.  If you have a book press, insert the text block and let glue dry.  I don’t have a press, so I put the pages under some heavy books to weight it.  Be sure the glue has dried, leaving it overnight, if possible.   MOCWeights Plug in the glue gun and while it’s warming up, get a ruler, the bone folder and the book cover.  Measure 1/4″ to the left of the cover’s spine and score from top to bottom with the bone folder.  Do the same to the right of the spine.  Fold a crease along the score marks.  This will enable the cover to open easily once the pages are in the book.MOCFoldHere   Now run a bead of hot glue down the spine of the cover.  Place the glued side of the text block into the spine, making sure to line it up with the top and bottom of the cover.

MOCHotGlue  Press and hold the text block to help the glue adhere.  Once the hot glue is set, take some PVA glue and brush a coat on the 1/4″ section that was creased along the spine on the front of the cover.  In the photo below I clamped the pages together to keep them out of the way.  MOCHotGlu   Press the end sheet down to the cover with the bone folder.  Repeat on the back cover.  Place the book under the weights once more to let the glue set up.  That’s it!  Admire your new book.

MochiBFldr                    MOCHIBook


ROSEMARY WREATH

The rosemary in my garden is still looking great so I thought I’d cut some to make a wreath.  It’s very simple to do and requires just a few tools.  Together with the rosemary, you’ll need clippers, a wire base and some green floral wire.  So the first thing to do is make a loop with the floral wire on the frame.  Then place one stem on the frame and start wrapping with the wire onto the frame.  Keep adding stems as you continue to wrap, overlapping the previous stem and try to hide the wire under the small rosemary leaves.  Cut some smaller pieces from the tops of stems to fill in any gaps.  Hold the wreath up and see what you think.  You can add a ribbon, some berries or rosehips, but I think it looks great just as it is.  And it smells wonderful!

Image

Image

Sketchbooks

Every now and then I try my hand at making journals and mini jotters and this time I made a sketchbook for myself from a used hardcover library book.  I watched some You Tube videos to learn how to do the coptic stitch. (The best was SeaLemonDIY.  She has a very clear and precise video tutorial)  I find that works better for me than trying to follow steps in a book. Need the visual.  It was a little tricky at first, but I took my time and once I finished, I liked the way it turned out.  I think I’ll make some more! These are some little jotters and journals I’ve been making too. I use the minis in my purse, my coat pockets, my car, so I can jot down a song I heard, or a quote I like, or to remind myself of things I have to do.  I need that a lot!

E Reader Book Cover

I got a Kindle e-reader from my kids last Christmas and have wanted to make some sort of cover for it.  So, today I looked at my collection of vintage books and chose a bright green one titled A Woman’s Place.  My supplies were: foam core, book cloth, a scrap of fabric, spray adhesive and/or tacky glue, a ruler, a rotary cutter or Exacto blade and pieces of elastic. Here’s the result and I have to say I’m very happy with it!  For anyone who might want to try making their own, I’ve put up a tutorial of how I did it. Click on the tutorial page under my banner.  This was definitely a fun project and a great way to use some of my old books! Let me know if you try making your own book cover and show me how it came out.